The first thing to consider before you set out to prepare your garage door frame is that a garage door is (or at least should be) a one-time investment that can either enhance or damage the aesthetic appeal of your building. You need to select raw materials and a design that not only fits your garage door needs, but also contributes to overall building’s appearance.
What Should Be the Size of the Opening?
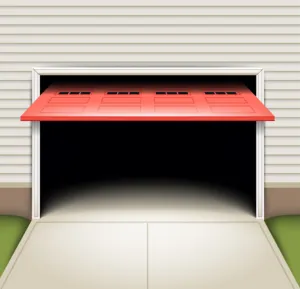
Before even thinking about various steps involved in preparing your garage door frame, it is essential to pay attention to the size of the garage door itself. With SUVs becoming increasingly popular, homeowners often choose the 8’ garage doors in place of the conventional 7’ doors, which, in turn, affects the basic parameters for your garage door frame.
Rough Opening
While garage doors close against rough openings, other types of residential doors fit inside the opening. Therefore, before determining a rough opening for the garage door, you need to decide upon the jamb material you’ll use. The size of the garage door framing should equal the size of the door, after the jamb is applied.
Double trimmers should be used for garage door headers considering the length and the weight they bear.
Headroom and Clearances
If your garage door uses torsion springs, then a 12” clearance between the ceiling and the top of the door opening is essential. If you use regular springs, the clearance can be 10”. For an increase in cost, however, you can reduce the clearance to 4 1/2” with both types of springs by using a special kit.
The next step is to check the rear clearance and headroom of the garage door to allow free movement of the door. Rear clearance should be 26″ (or 40″ if you use an operator) while headroom should be 5″ or 8″, depending on the type of springs you use.
Header and Back Jambs
Once you determine the right size of the garage door, turn your attention to the header and back jambs. Start by getting the header flush on the same level with the back jambs. The next step is to ensure that the back jambs are perpendicular, plumb, and square.
Additional Tips
- You should fixate the side and head jambs after the wall is in place.
- The side jambs should be a quarter of an inch away from the concrete floor to avoid rot and moisture wicking.
- Ideally, avoid using treated lumber for door jambs as it can potentially lead to rust on the steel and holes in aluminum.
Considering the implications of faulty installation of your garage door, don’t be afraid to use pen and paper to sketch out all the details and keep it handy before you start working.
Need Professional Help to Create a Garage Door Frame?
It can be pretty challenging to undo mistakes made during garage door frame preparation. Don’t hesitate to contact one of our dealer today, and they will be happy to provide you with additional tips and tricks that will help you build your perfect door.
And if you’re looking for new garage door options, we have lots of options, too.
Add new comment